The Easiest DIY to German Smear Your Fireplace Mantel with Premixed Grout (Before & After Makeover)
If you've been dreaming of a brighter, more timeless fireplace without spending thousands on a renovation, this DIY German smear fireplace makeover might be exactly what you're looking for. Here's how I transformed our outdated brick fireplace using pre-mixed grout—no messy mortar mixing required!
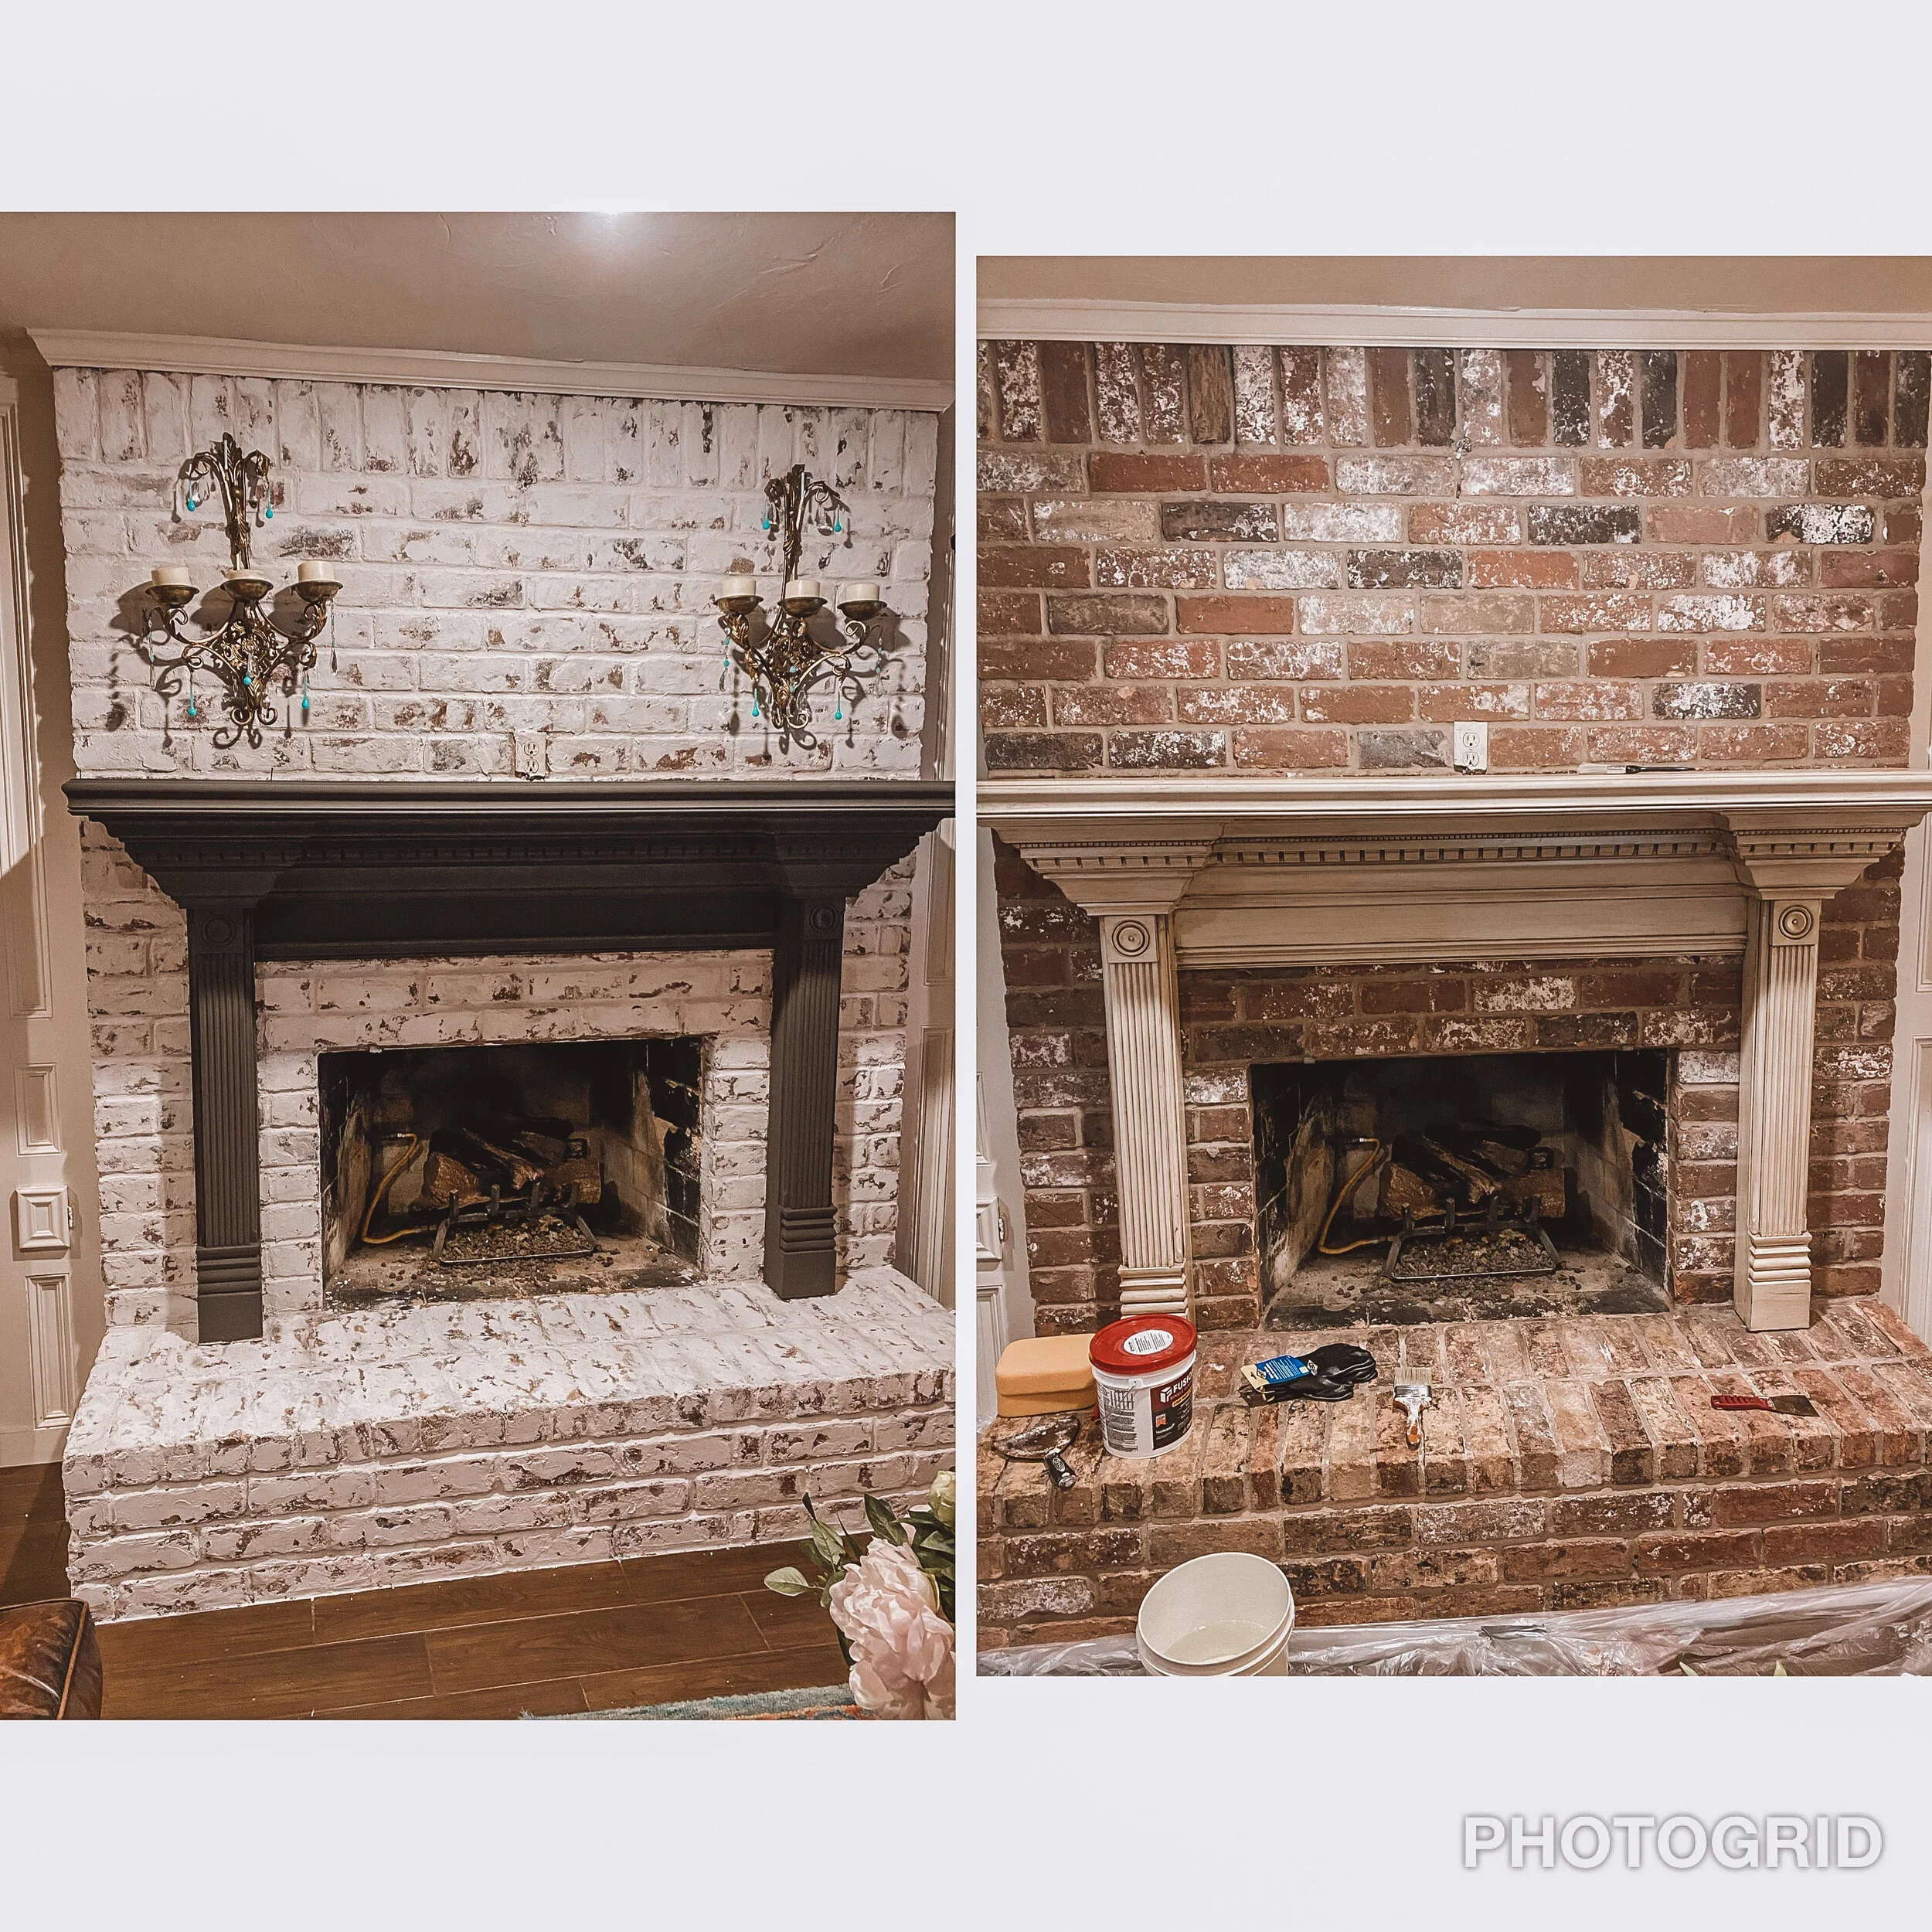
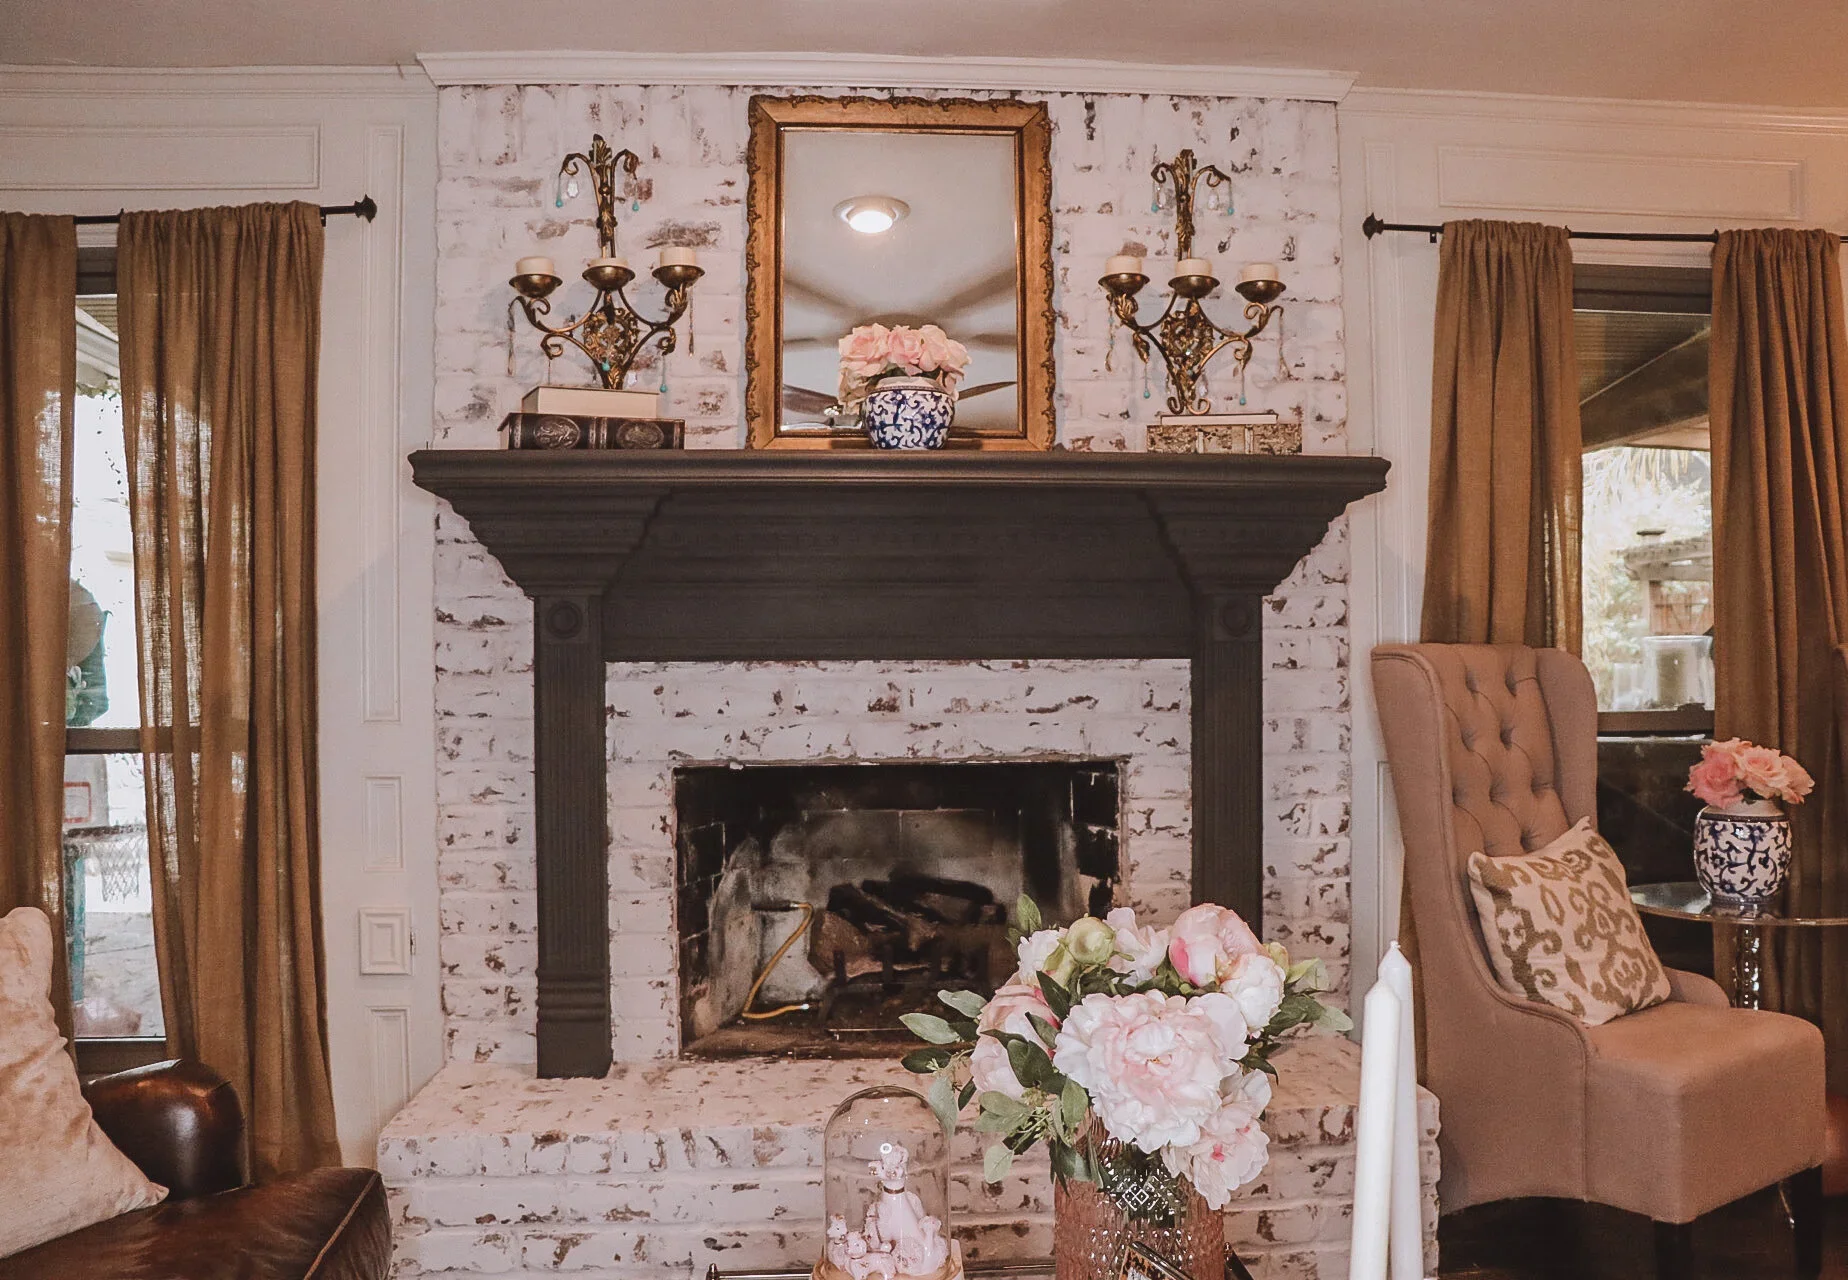
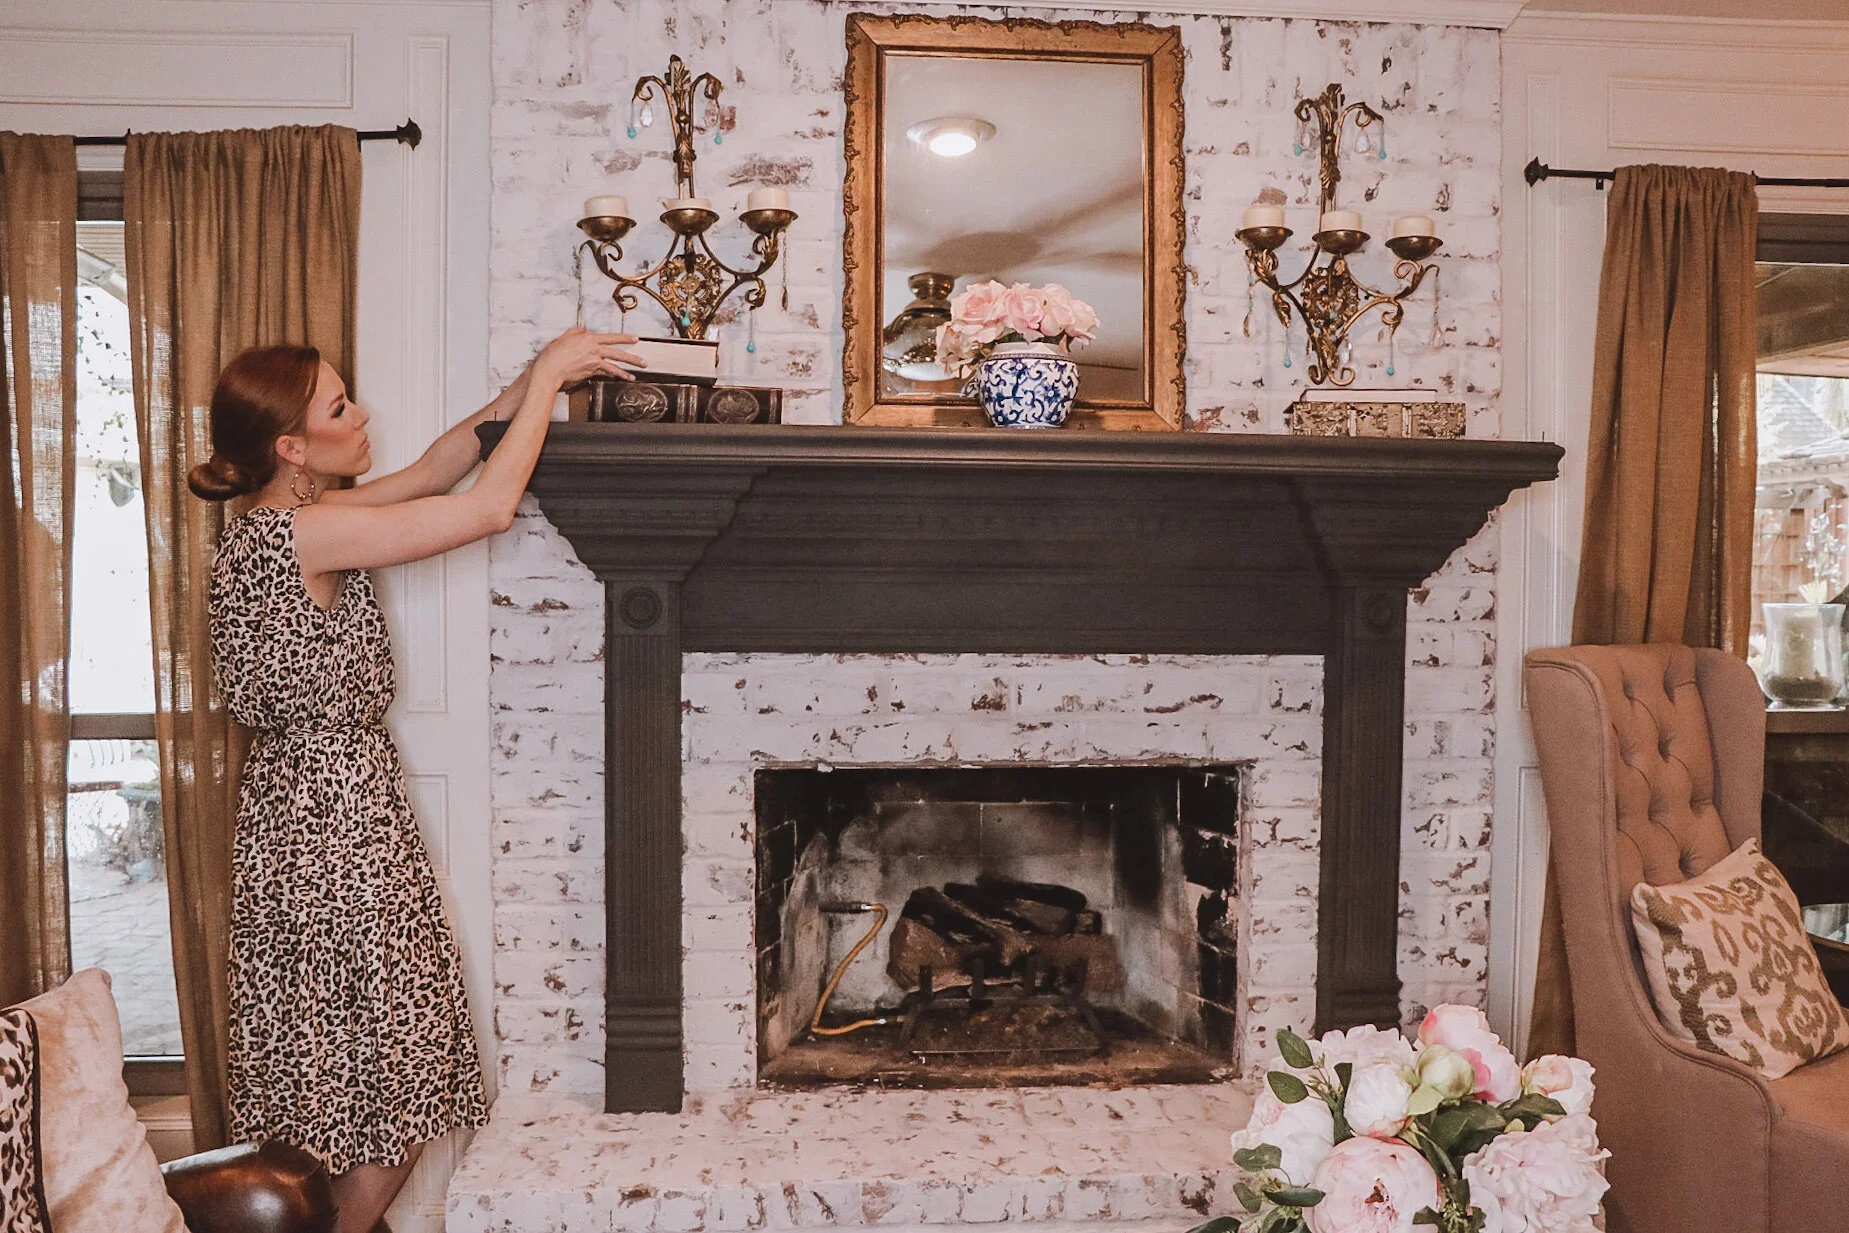
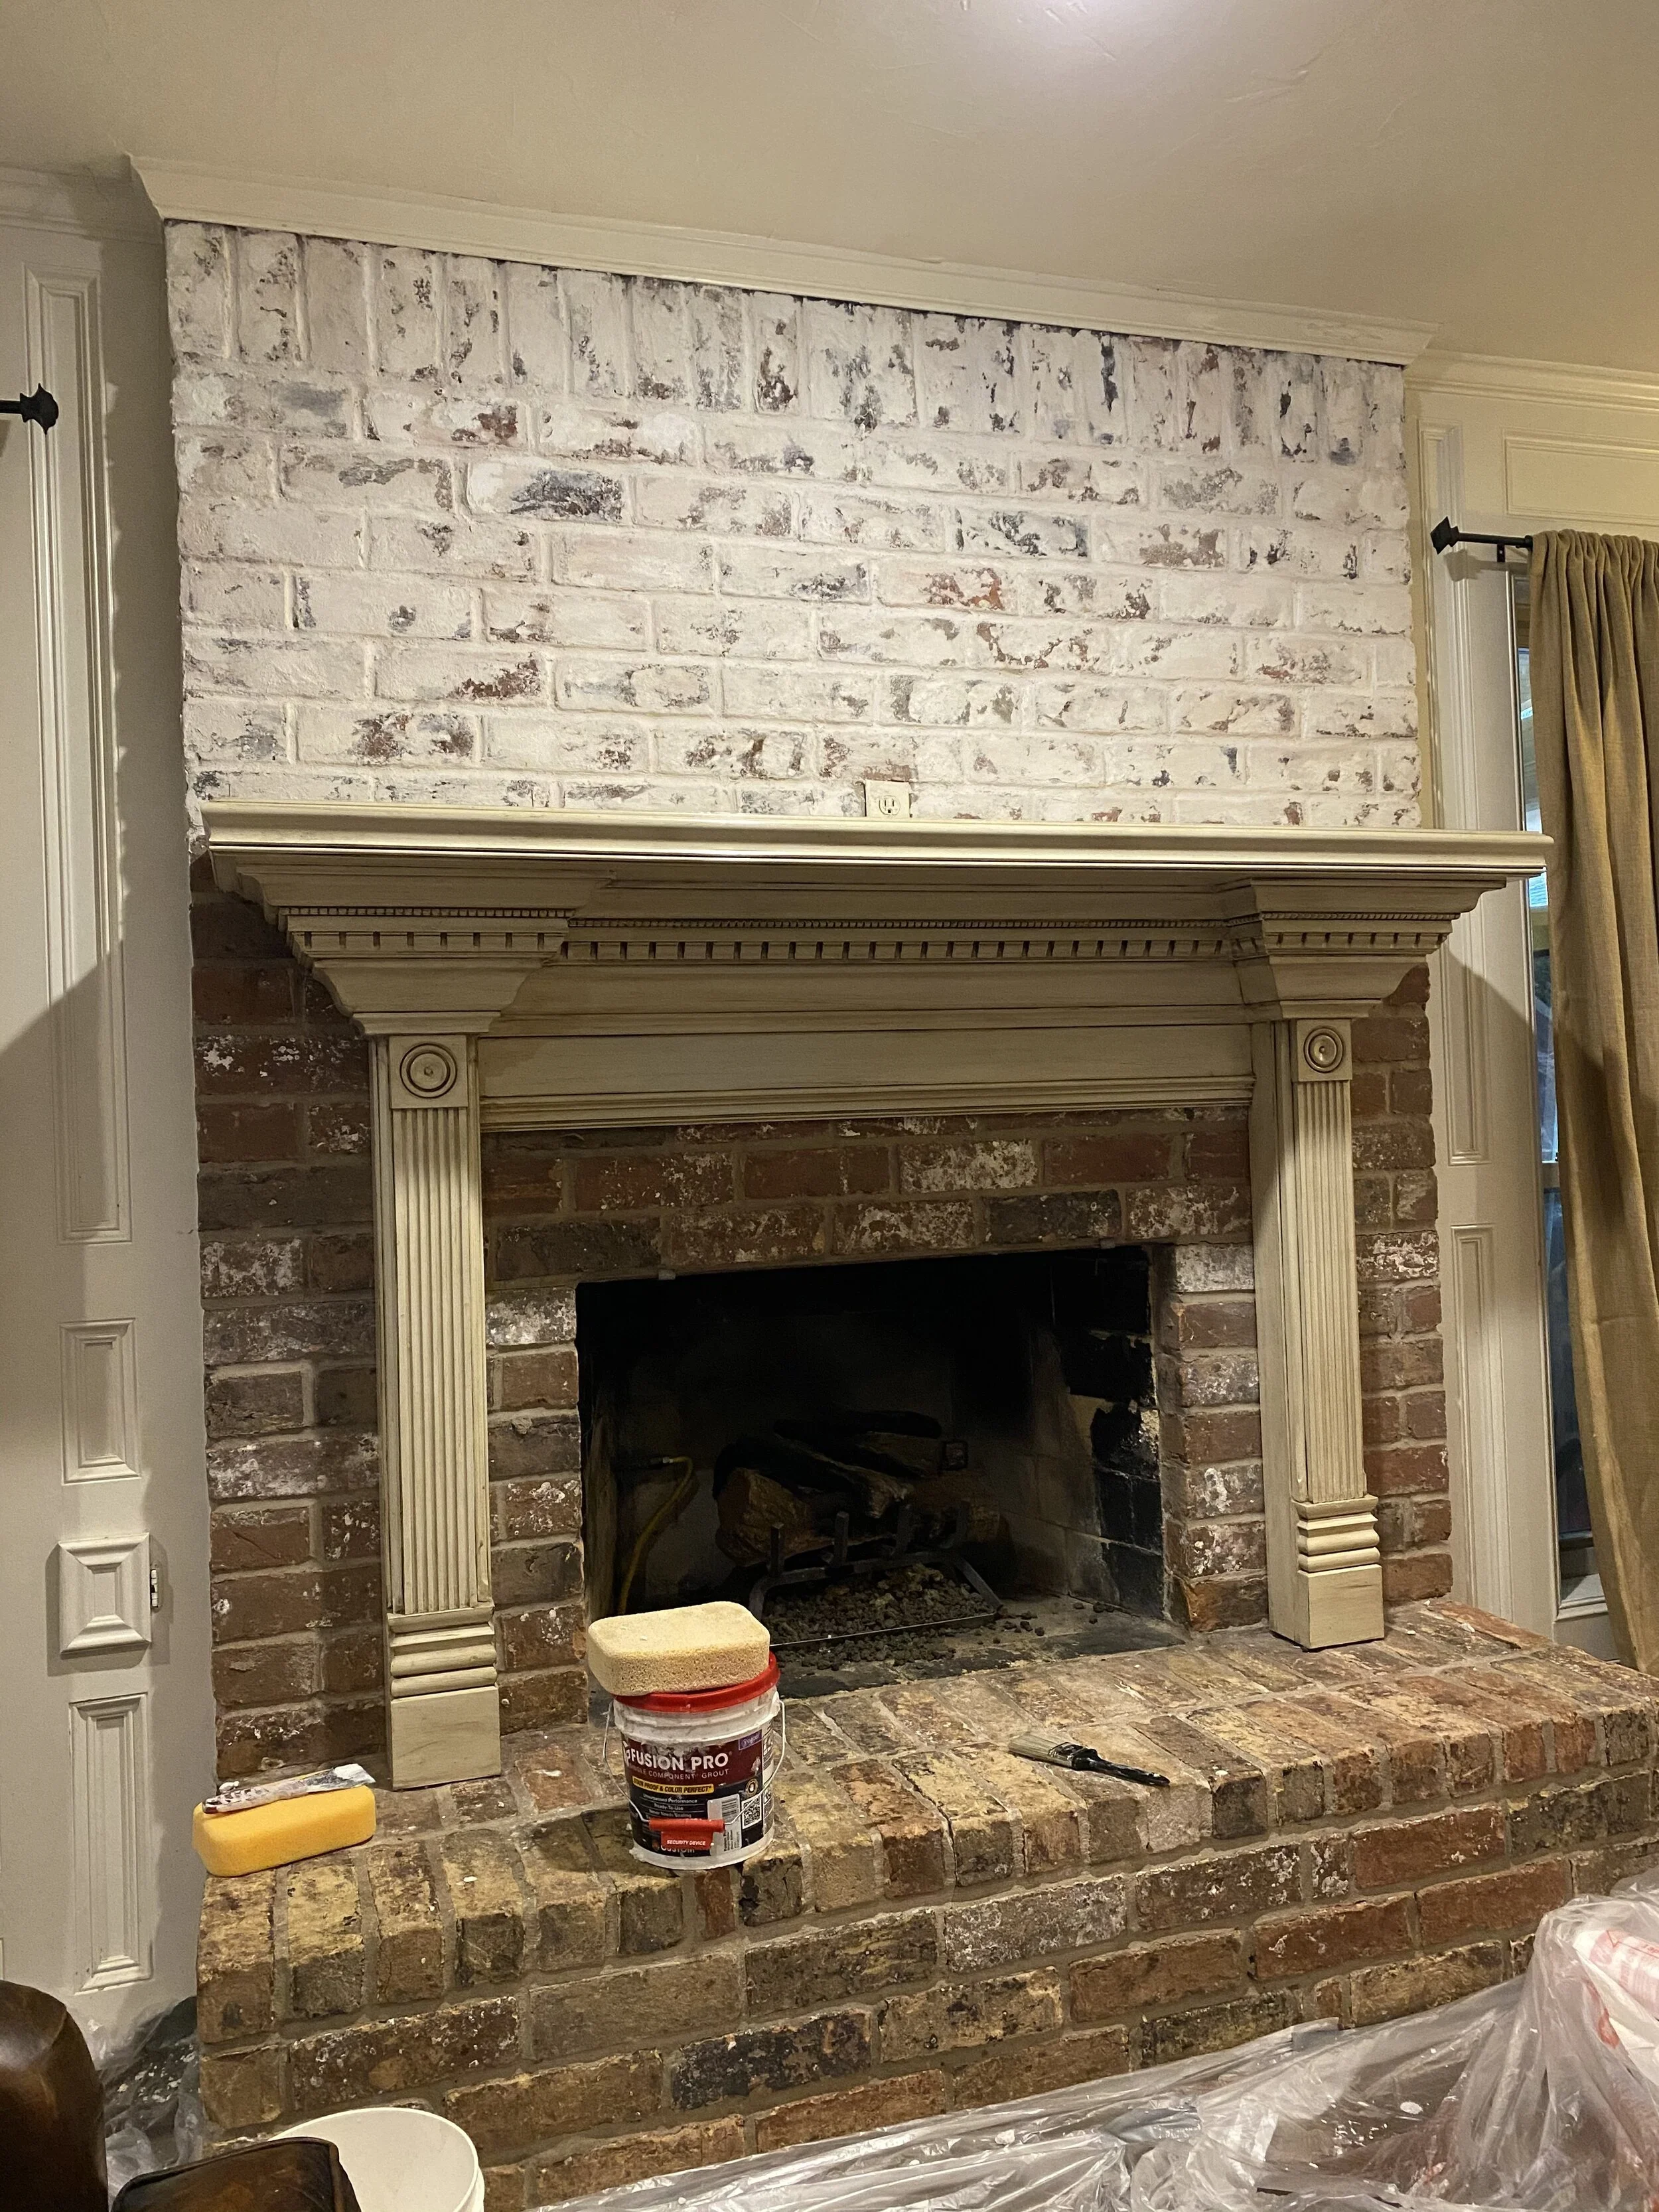
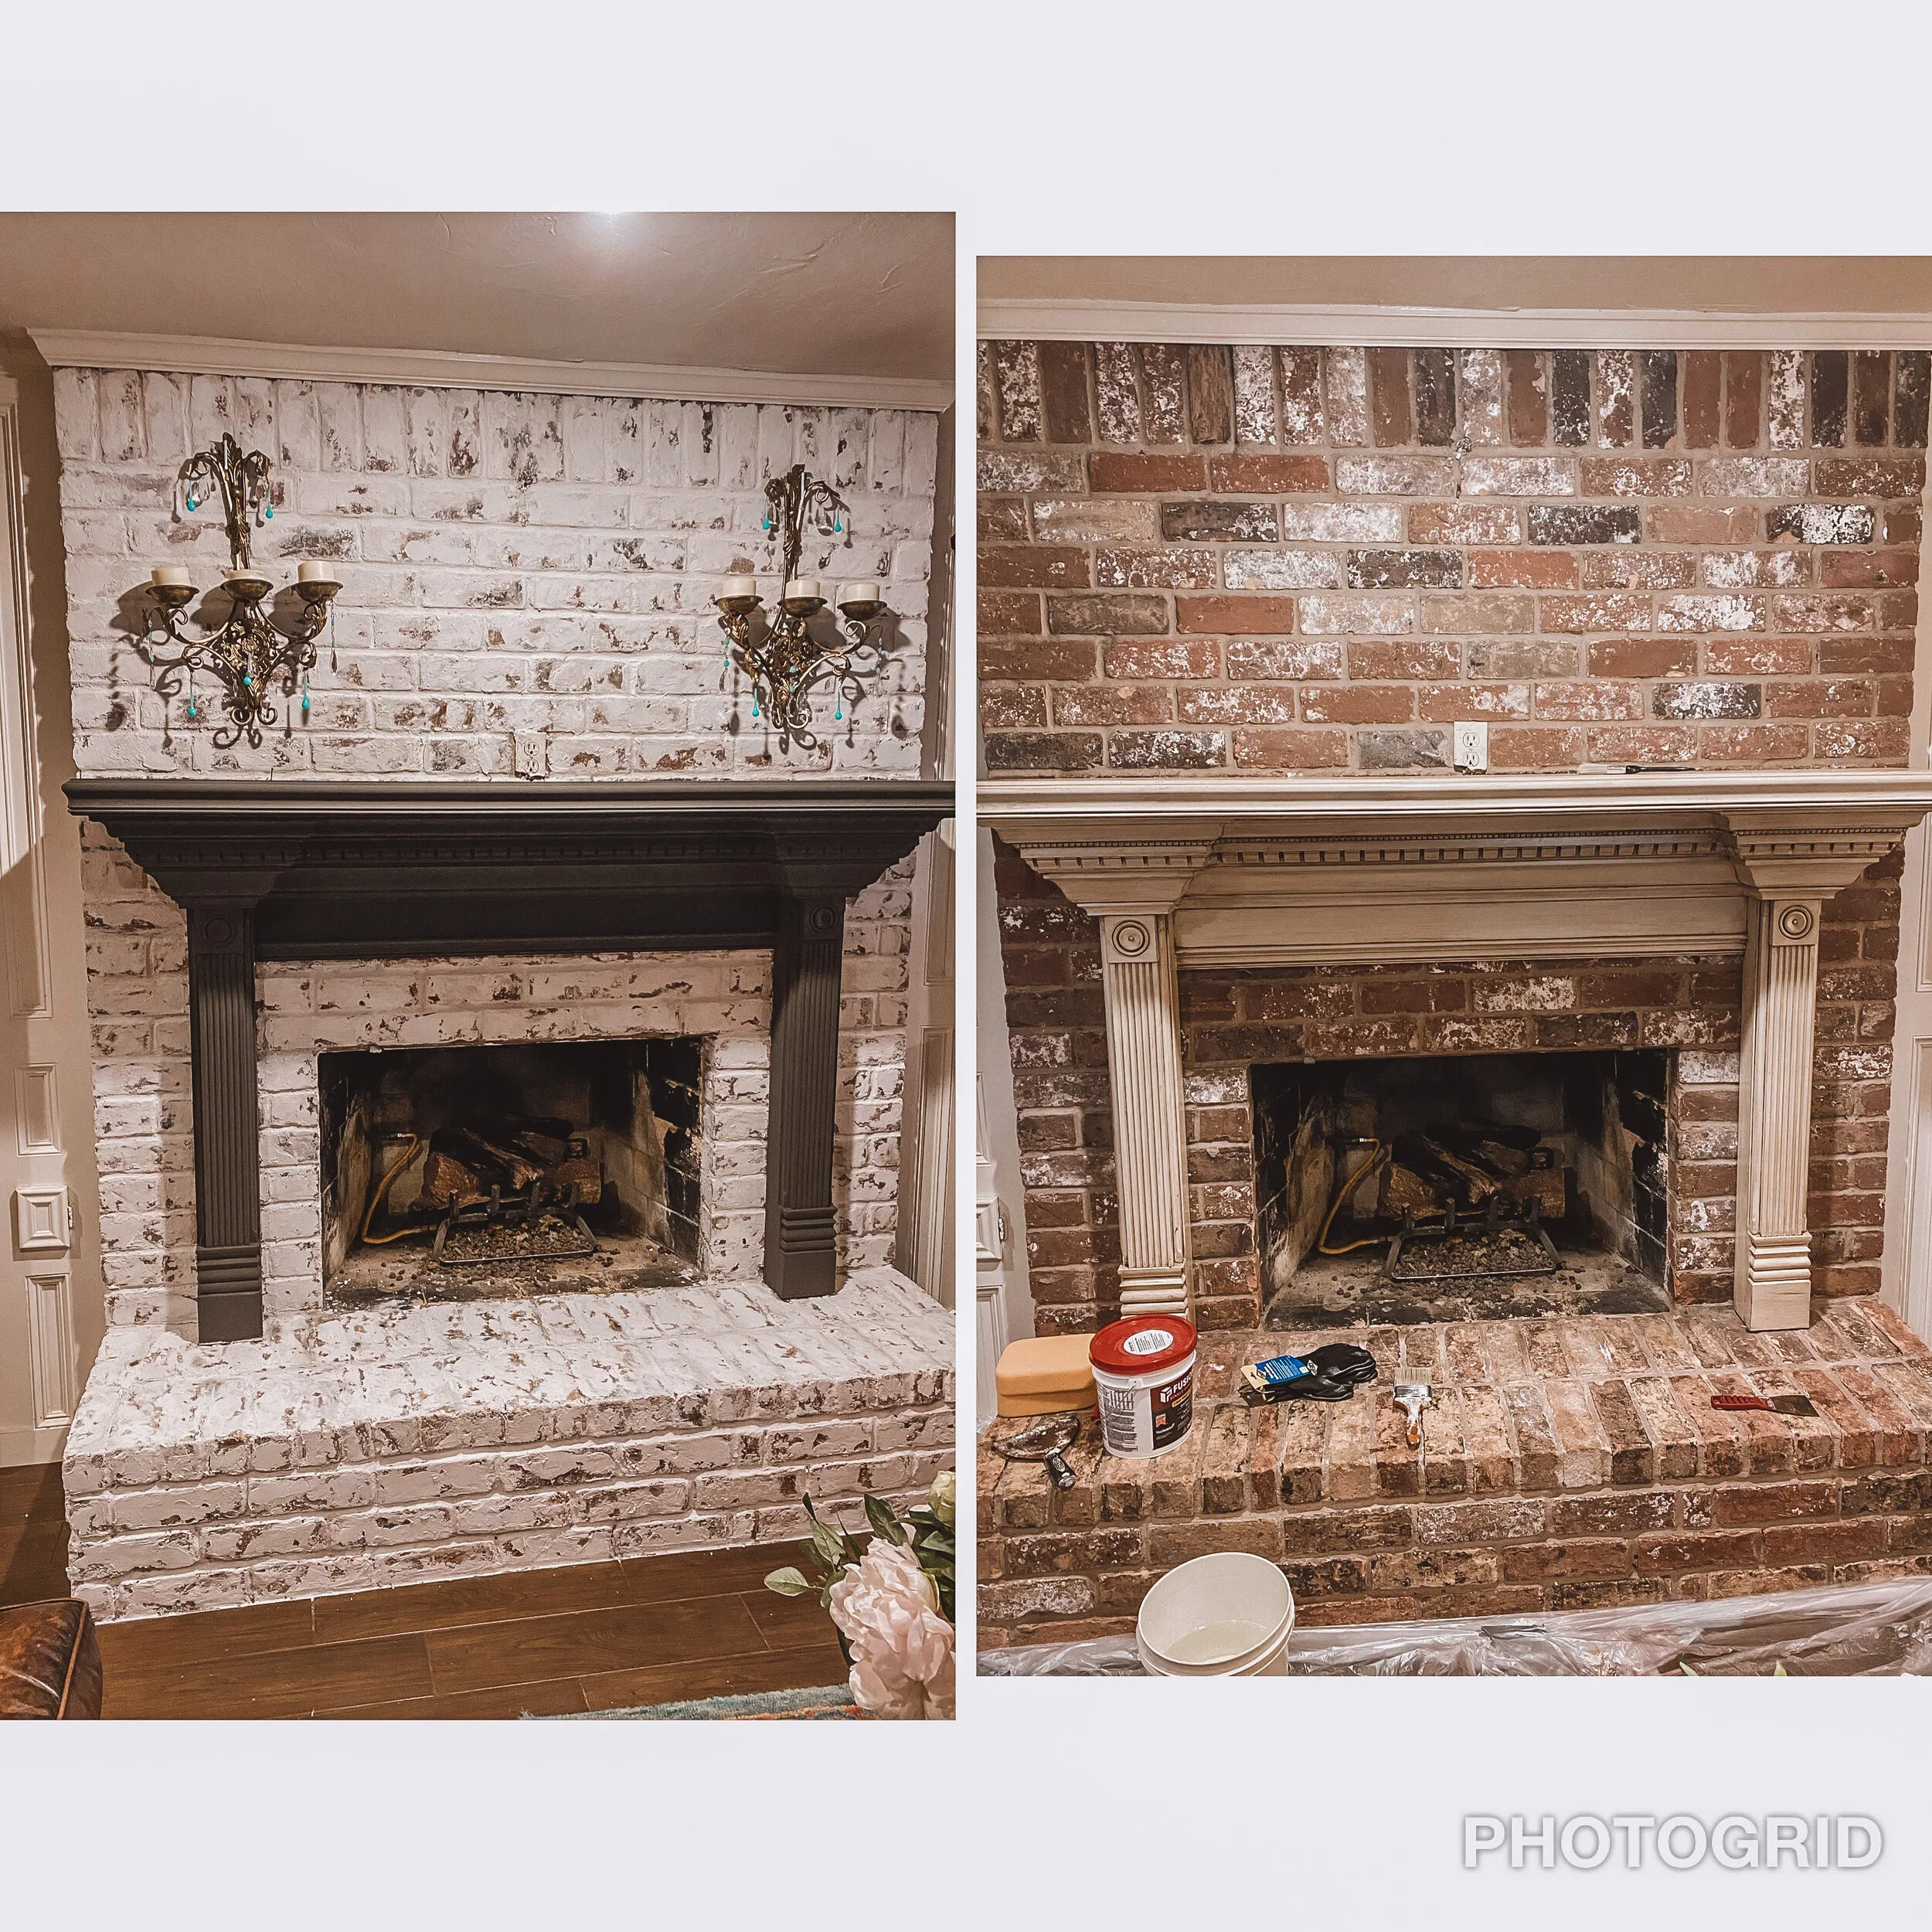
Our DIY German Smear Fireplace Before & After
This post contains affiliate links that will give me a small commission if used to purchase. Everything linked are the exact items I used!
Out of every DIY project we've tackled in our home, this one is still at the very top of my list.
The moment we toured this house for the first time, I looked at the fireplace and immediately pictured it with a beautiful German smear finish. I loved the character of the brick, but I knew lightening it up would completely transform our living room while still preserving all of the texture that makes brick so beautiful.
I just had to convince my husband first.
He loved the original brick. The mantel had also been custom-built, hand carved, and antiqued for the previous homeowners, so understandably he wasn't exactly thrilled with the idea of changing it.
Meanwhile, I couldn't stop picturing the finished product.
So naturally, I started sending him Pinterest inspiration. One gorgeous German smear fireplace before and after after another finally convinced him that maybe I wasn't completely crazy.
Needless to say, I was at Home Depot that same afternoon.
Looking back now, I'm so glad I did it. This single project completely transformed our den without requiring a major renovation or a huge budget.
Why I Chose a German Smear Instead of Painting the Brick
Before starting this project, I researched everything.
Painted brick.
Limewash.
Whitewashing.
Traditional German smear.
After comparing all the different techniques, I kept coming back to the look of a German smear. I loved that it leaves portions of the original brick showing through, giving the fireplace an old-world European feel instead of covering everything with a flat coat of paint.
It feels rustic, timeless, cozy, and bright all at the same time.
Exactly what I wanted for the heart of our home.
The Secret That Made This DIY So Much Easier
One thing you'll notice if you've been researching German smear tutorials is that almost everyone mixes their own mortar.
I didn't.
Instead, I used pre-mixed, pre-colored grout, and honestly, I would do it this way again in a heartbeat.
There was no guessing the consistency.
No mixing buckets.
No clouds of mortar dust.
I simply opened the container and got to work.
If you're a beginner or just want an easier DIY, I highly recommend this method.
I've linked the exact grout I used below.
Supplies You'll Need
Here's everything I used for this project: (All direct links at the bottom)
Pre-mixed, pre-colored grout (linked here)
Putty knife or drywall knife
Large grout sponge
Bucket of clean water
Rubber gloves
Drop cloths
Painter's tape
Old towels or rags
Paint for the mantel (optional, but I highly recommend it!)
How to DIY a German Smear Fireplace
Step 1: Clean the Brick
Start by wiping down your fireplace to remove dust, soot, and dirt. A clean surface helps the grout adhere much better. (Be careful here because my brick was orange/red and if the dye comes off your brick let it completely dry before putting the grout or you’ll get pink grout LOL).
Step 2: Apply the Grout
Using a putty knife, spread the pre-mixed grout directly over the brick.
I worked in small sections so I had plenty of time to adjust the finish before it started drying.
Don't worry about making everything perfectly even.
The beauty of a German smear is that it's supposed to look imperfect. I used my hands (with gloves) a lot to spread around and in between the bricks.
Step 3: Wipe It Back
After letting the grout sit briefly, use a damp grout sponge to gently wipe portions away.
This is where the transformation really starts happening.
Some bricks will have more grout.
Others will show more of the original brick.
That variation is exactly what creates the beautiful old European look.
Step 4: Keep Stepping Back
One of the best tips I can give you is to keep walking across the room every few minutes.
It's easy to get focused on one tiny section.
Stepping back lets you see whether everything looks balanced across the entire fireplace.
Step 5: Let It Dry
Once you're happy with the finish, leave it alone.
As the grout dries, it lightens slightly, revealing the soft, aged look you're after.
Don't Skip the Mantel
For me, painting the mantel was just as important as the German smear itself.
The combination of the lighter brick and freshly painted mantel completely modernized our living room while still keeping the warmth and character that originally made us fall in love with the house. The color I chose was Graphite, by Annie Sloan (Amazon).
Sometimes it's the small details that make the biggest difference.
Common Mistakes to Avoid
If I could give my past self a few tips before starting, they'd be these:
Work in small sections.
Don't completely cover every brick.
Trust the imperfections.
Step back often to check your progress.
Keep a bucket of clean water nearby for your sponge.
Remember—you can always remove a little more grout, but adding it back is much harder.
German Smear vs. Limewash
If you're trying to decide between the two, here's my quick opinion.
Choose a German smear if you want:
✔ More texture
✔ A timeless European look
✔ A brighter fireplace without losing the brick character
✔ A finish that's incredibly durable
Choose limewash if you prefer a softer, more chalky finish that naturally ages over time.
For our home, German smear was the obvious winner.
Is a German Smear Fireplace Worth It?
Without question.
This project completely changed our living room for a fraction of what a full fireplace remodel would have cost.
Every time I walk into this room, I'm reminded that sometimes the projects we're the most nervous about end up becoming our absolute favorites.
If you're standing in front of your fireplace wondering whether you should finally do it…
This is your sign.
Frequently Asked Questions
Can beginners do a German smear?
Absolutely! Especially using the pre-mixed grout method. It takes away one of the trickiest parts of the process and makes it much more beginner-friendly.
Does German smear permanently change the brick?
Yes. Unlike paint, a German smear uses grout or mortar, making it a permanent finish.
How long does it take?
Most fireplaces can be completed in a single afternoon, depending on size. This only took me like 2 hours to complete. May take a bit longer if you are planning to also paint your actual mantel. If you use the Annie Sloan paint you’ll also need the wax when it dries to finish it off and seal it for protection. Everything linked here!
Final Thoughts
Years later, this is still one of my favorite DIY projects we've ever completed and my MOST popular pinterest post!
It made our home feel brighter, more custom, and so much more "us."
If you've been searching for an affordable way to transform an outdated brick fireplace, I honestly can't recommend this project enough.
And if you decide to tackle your own German smear fireplace, I'd love to see it! Leave a comment below or tag me on Instagram with your before-and-after photos. Seeing your DIY projects is one of my favorite parts of sharing our home online.
Happy DIYing!
Shop My Materials Here for This Project!